StructureEditor Help Contents
Back to Top
The StructureEditor Program
StructureEditor is an RNA secondary
structure editor and drawing tool. It facilitates editing the primary
sequence (inserting or deleting nucleobases) as well as modifying the
secondary structure (creating and deleting basepairs) and visualizing
the secondary structure in a 2D drawing.
It aids in secondary structure drawing by providing useful tools, such
as loop resizing or helix rotation around a multi-branch loop, while
also allowing the user to have full control of the exact positioning
and formatting of nucleobases.
StructureEditor can also act as as a
conversion tool for RNA-related file formats because it can open a
number of file types and can also export to a variety of file formats.
For example, one could open a CT structure file and export it as a
Dot-Bracket (DBN) file, a Sequence (SEQ or FASTA) file, or an image
(SVG, PNG, JPEG) etc.
Back to Top
Getting Started
Begin using the program by either opening an existing
file or by creating a new one using the
menu.
You can open any of the file types listed below:
- Structure Drawing Files contain drawing information (e.g. 2D
positioning, color, and formatting) in addition to sequence and
structure.
- Nucleobase Structure Drawing (nsd) – The StructureEditor's native file format.
- Extended CT file (cte)
– A CT file with more columns containing additional information such as
nucleotide X and Y positions in the drawing.
- Structure Files contain secondary structure
information (i.e. basepairs) in addition to the sequence.
- CT Connection file (ct)
- Dot-Bracket file (dbn, dot, bracket)
- Sequence Files contain only nucleobase sequence
information and are opened as an unstructured (circular) chain of
bases, to which basepairs can be added.
- FASTA Sequence (fasta, fa)
- SEQ Sequence File (seq)
- Plain Text Sequence File (txt)
- RNAstructure Saved-Calculation Files contain sequence information and may
contain additional information from partial or completed RNAstructure
calculations.
- Partition Function Save File (pfs)
- Fold Save File (fsv, sav, save)
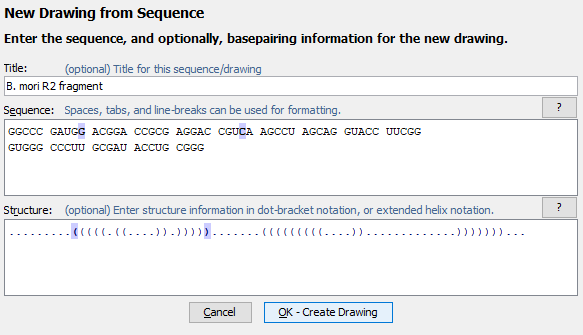
You can create a new drawing using the menu
command. This allows you to enter a sequence and optionally a structure
in dot-bracket notation, helix notation, or paired-positions notation.
Switching between structures
Often files contain more than one structure. For example the CT files produced by the RNAstructure program Fold often contain a minimum free energy structure along with several sub-optimal structures. The StructureEditor only shows one of these structures at a time, but you can choose antoher structure to view using the menu item (or the associated toolbar button). You can also switch to the next or previous structure in a series using the menu items or .
Back to Top
Drawing Modes
Structures can be visualized in one of the three modes listed below. You can switch between modes using their associated menu commands, keyboard shortcuts, or toolbar buttons. Switching from one mode to another (or even redrawing in the same mode) is destructive in the sense that any changes made to the X,Y positions of bases will be reset and redrawn according to the chosen mode. (However structural changes such as basepairs and formatting changes, such as base colors, will be preserved.)
Drawing Modes
| Mode |
Description |
Toolbar Icon,
Menu Command &
Keyboard Shortcuts |
Example |
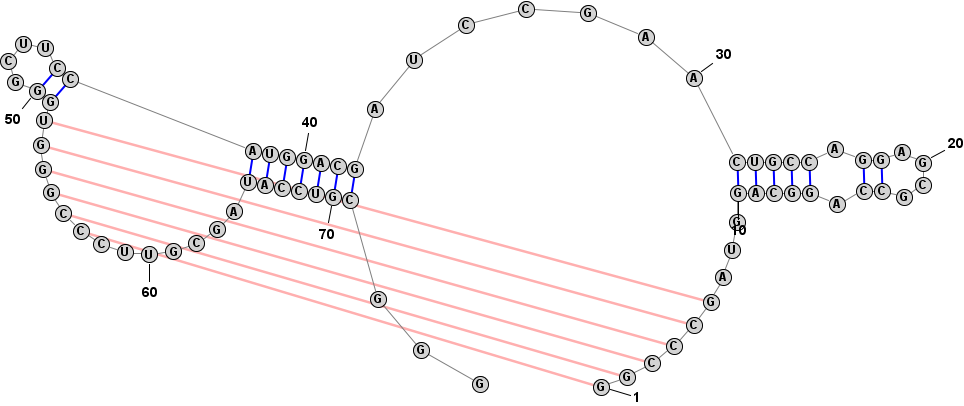
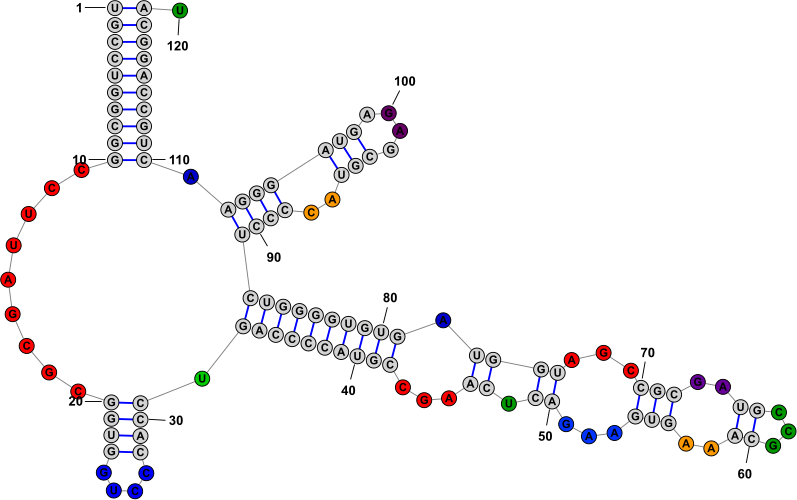
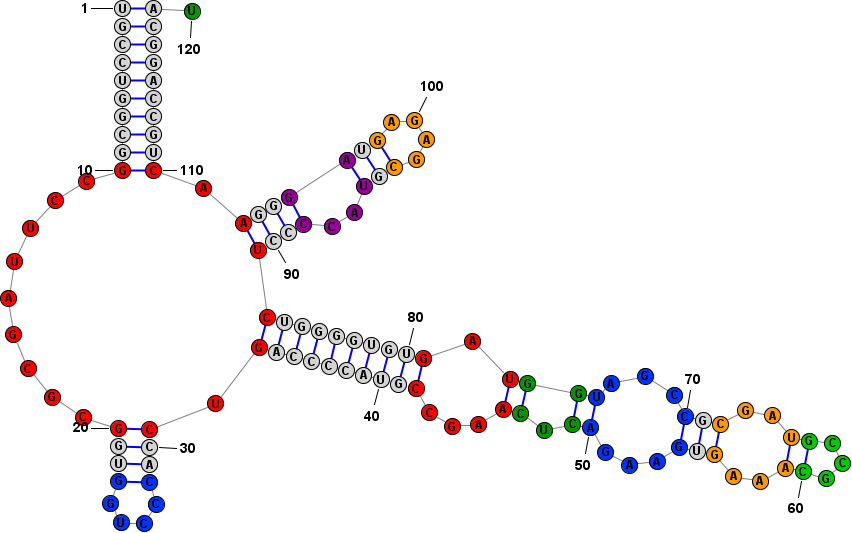
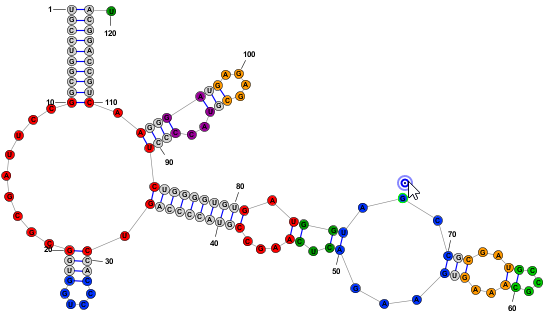
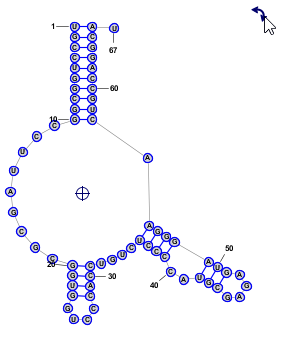
Radial
(default) |
A radial layout algorithm is used to estimate the best way to position nucleobases with the following constraints: paired bases are next to each other and helices are straight. Multibranch, internal, and hairpin loops are circular while bulge loops are straight. |
Ctrl+R
Mac: ⌘+R
|
 |
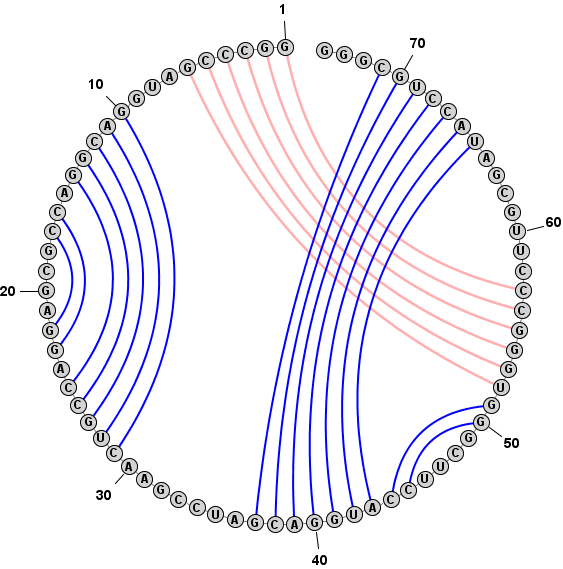
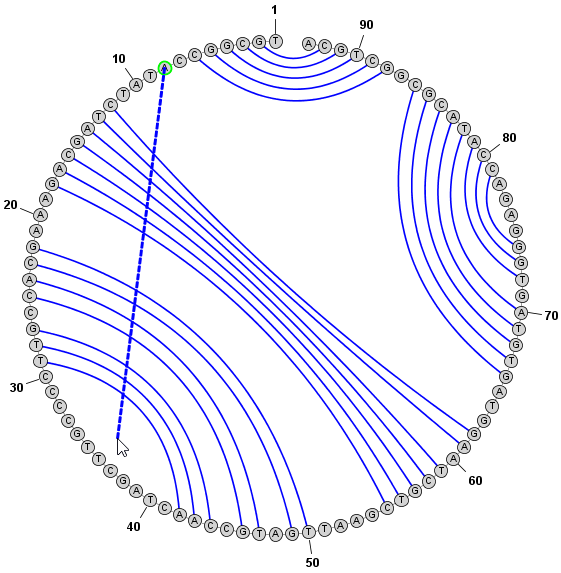
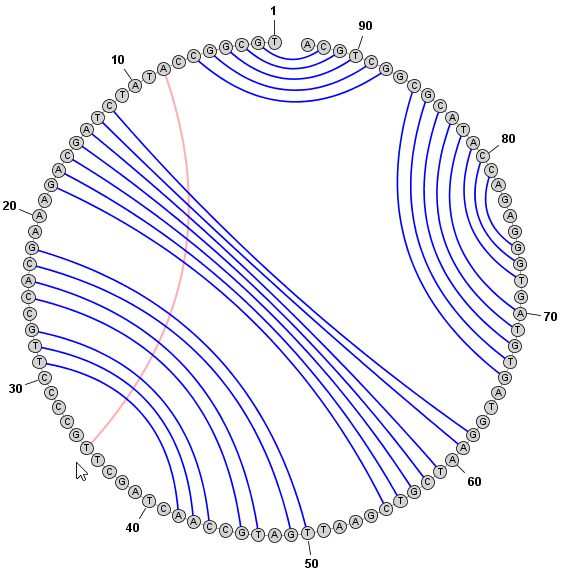
| Circular |
Bases are arranged in a circle. Basepairs are shown as arcs inside the circle. |
Ctrl+Shift+R
Mac: ⌘+Shift+R
|
 |
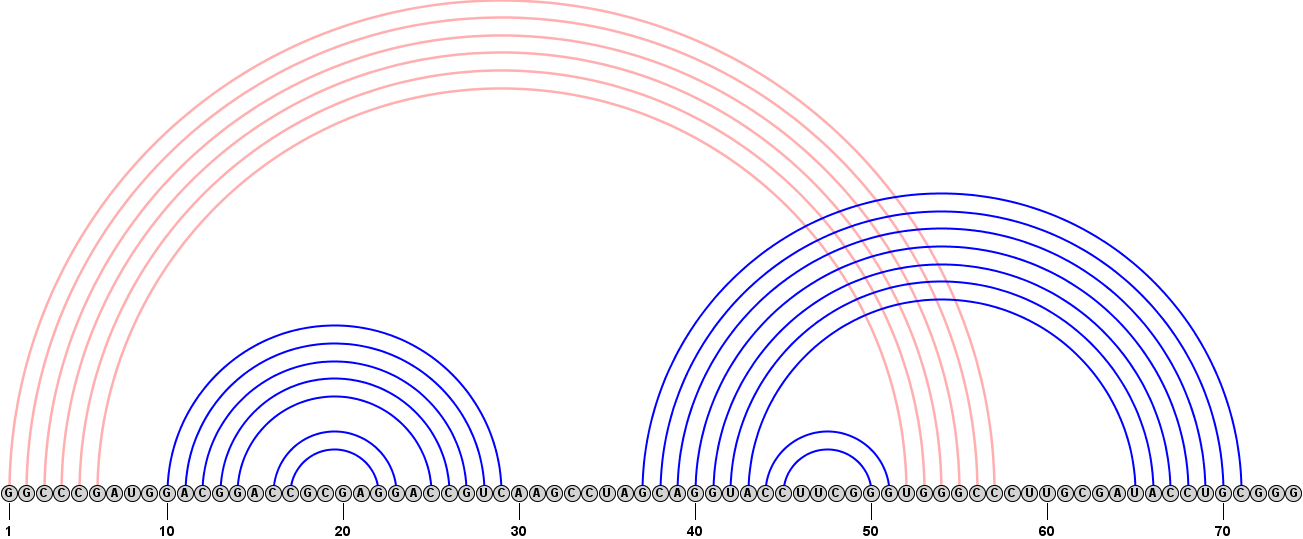
| Linear |
Bases are arranged in a line with basepairs forming semi-circles on one side of the line. |
Ctrl+Shift+L
Mac: ⌘+Shift+L
|
 |
Back to Top
Drawing Orientation
In Radial or Circular mode, structures can be drawn clockwise or counterclockwise. You can change the direction of drawing using the menu item, but note that this setting only has an effect when the structure is redrawn.
You can reverse the orienation of an already-drawn structure using the menu item .
Back to Top
View and Zoom
RNA structures can be quite large and it is often desirable to zoom in or out of the drawing to either see a region in greater detail or conversely to fit more of the structure into view. The following menu commands (or associated toolbar buttons) can be used to zoom to the desired magnification level.
Zoom Tools
| Menu Command |
Description |
| Increase Magnification |
|
Decrease Magnification |
|
Use the highest magnification possible while still fitting the entire structure in the view area. This also moves the structure as close to the top-left corner of the view. |
|
This sets magnification to 100%. At this magnification, nucleobases are 16 pixels in diameter and the Font size of nucleobase symbols is 10 pt (Arial). |
| A quick way to zoom is to hold down the Control key (⌘ Command key on Mac) while scrolling the mouse wheel up (to zoom in) or down (to zoom out). When zooming in with the mouse wheel, you can point the mouse at the part of the structure you would like to zoom in on. |
 |
Back to Top
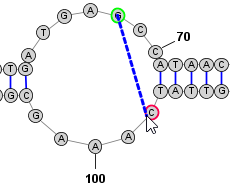
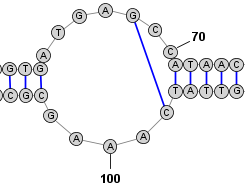
Nucleobase Selection
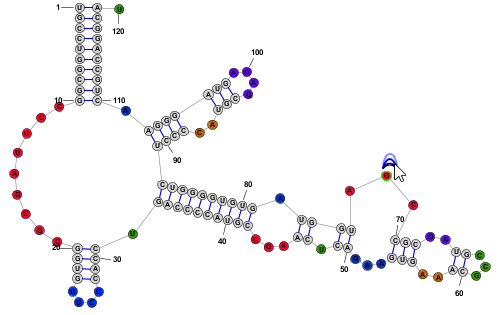
A nucleobases (aka base, nucleotide) can be selected by clicking on its symbol (letter) or anywhere inside the circle surrounding it. Multiple bases can be selected holding down the Shift key while clicking additional bases after the first one. Alternatively, you can click on any location in the background of the drawing and drag to select multiple bases using a selection rectangle. Selected bases are highlighted by changing their outline color (to blue, by default).
Selection Rectangle: 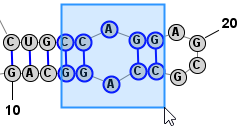
One base among the selection may have a different highlight color (lime green, by default) to indicate that it is the "focused" base. The identity of the focused base may influence the type of movements or tools that are available after selection, as described later. You can click on any base among the selection to assign it as the focused base, without changing the list of selected bases.
Multiple selected bases (blue outline) and Focused base (lime green outline):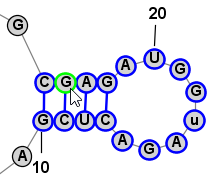
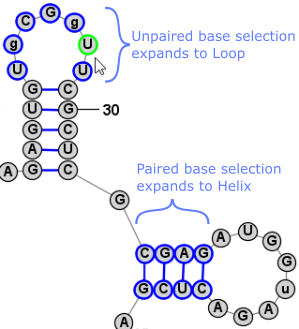
It is sometimes easier to have the program automatically select a larger section of the structure when you click on a nucleobase. For this reason, there are three selection modes, as listed below. You can switch between them using the associated Toolbar, Menu, or Shortcut Key.
Back to Top
Nucleobase Selection Modes
| Single |
Clicking a base selects only the single base that was clicked. |
N(with no other keys)
|
| Helix/Loop |
Clicking a base selects the .Loop (if the base is unpaired) or Helix (if the base is paired) that contains the clicked base. |
H(with no other keys)
|
| Branch |
Clicking a base selects the Branch that contains the clicked base. |
B(with no other keys)
|
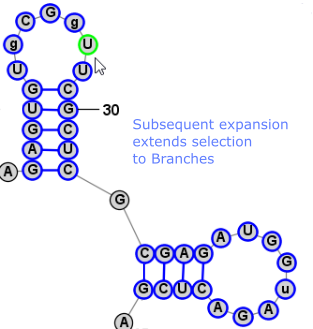
Another very convienient way to select additional bases is . This operation can be peformed by simply clicking Space. This selects a Loop/Helix when one base is selected and then, if performed again, it selects the containing Branch. This is an easy way to work in Single selection mode, but to quickly select the Helix/Loop or Branch that contains the selected base (or bases).
Back to Top
Expanding Selection from Single Base to Motif (Helix or Loop) to Branch
Back to Top
Adding and Removing Basepairs
Basepairs can be added by holding down the Control key (⌘ Command key on Mac) while clicking (with the left mouse button) on a base and then dragging the mouse pointer to another base. A basepair will be formed between the two bases.
To remove (delete) a basepair, simply click on one of the bases involved and press the Delete key. You can select multiple nucleobases at once and click Deleteto remove all basepairs on any of the selected bases.
Adding a Basepair in Radial Mode:
 → → 
Adding a Basepair in Circular Mode:
 → →
Back to Top
Inserting, Editing and Deleting Nucleobases in the Sequence
Bases can be inserted by first selecting a single base in the existing sequence and then clicking the menu item . You can then enter the sequence you wish to insert, either before or after the selected base.
Bases can be deleted by first selecting one or more bases to delete, and then clicking the menu item .
You can edit the sequence to change either a single base (e.g. from A to C) or a section of the sequence. First select the base or bases you wish to modify and the click
Back to Top
Positioning Nucleobases and Using Semi-Automated Layout Tools
Once you have made a selection, you can click (with the left mouse button) on any selected base and drag (while holding the mouse button down) to move the entire selection to a new location.
In addition to being able to position individual bases manually, StructureEditor also provides several tools that facilitate moving larger motifs (loops, helices, multi-loops, branches, etc) in semi-automated ways to speed up the positioning of these elements or to redraw them in aestetic ways.
Loop Resizing
When the focused nucleobase is unpaired, you will see one of the following icons next to it: or . These icons are called "Drag Handles" and they allow you make coordinated changes to multiple bases at once by clicking and dragging them. The former icon allows you to resize a "Loop" while the latter allows you to resize a "Multi-Loop" (aka "circuit"). The distinction between the two is described in the table below. You can switch between Loop-Resizing and
Multi-Loop-Resizing by clicking the the menu item . You can also temporarily toggle between the two modes by holding down the Shift key while dragging the handle.
Loops vs Multi-Loops
| Loop |
"Multi-Loop" or "Circuit" |
| One contiguous unpaired section of the RNA structure (e.g. a hairpin loop, a bulge loop, one side of an internal loop, one section of a multi-branch loop, or one section of an external loop) |
One or more Loop sections (and the helices that join them) to form a full circuit, closed by paired bases |
Loops are highlighted. Different colors only indicate that each section is an individual loop.
|
Multi-Loops are highlighted. Note that each full circuit, including the paired bases that close the circuit are included.
|
Resizing Operation: Only one loop section is modified. No helices are moved.
|
Resizing Operation: All loop sections in the circuit are resized. Helices are also re-positioned, including all bases attached to each helix. The "trunk" helix (closest to the 5' end) is not moved.
 |
Branch Sliding
When the focused nucleobase is paired, you will see the following icon next to it: .
By clicking and dragging this "Drag Handle" you can move a helix around the circumference of a Multi-Loop. All bases attached to the helix are also automatically repositioned, including the unpaired bases in Loop sections on either side of the helix, which are evenly spaced along the circumference of the Multi-Loop.
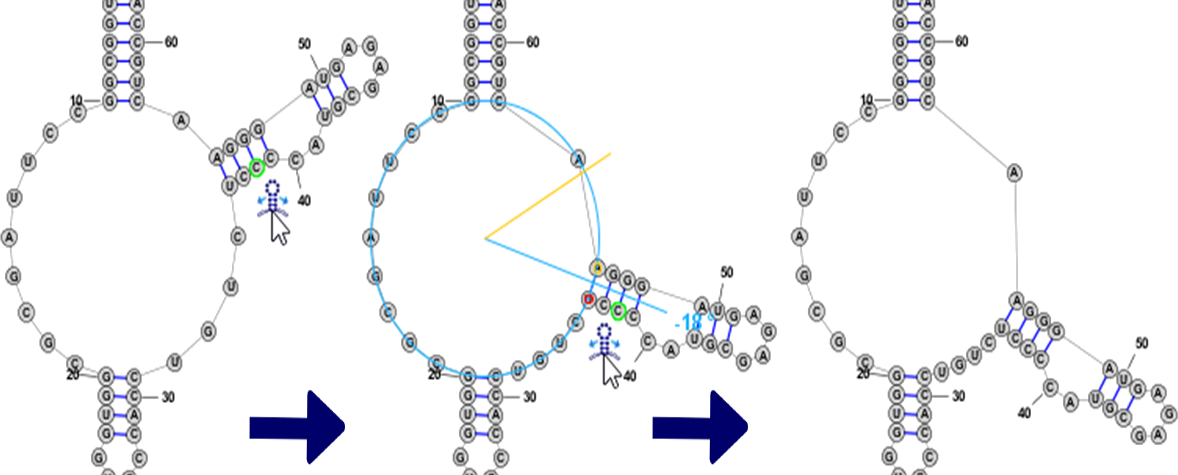
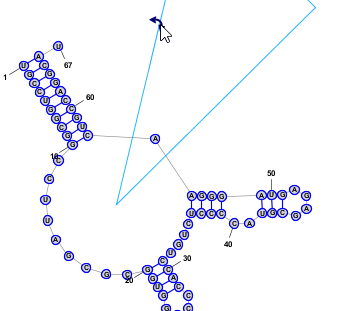
Free Rotation
When two or more bases are selected a rotation Drag Handle will appear near the top-right corner of the bounding rectangle that contains all selected bases. In addition a cross-hair handle will also appear, either at the base of a helix or at the geometric center of all selected nucleotdies. By dragging the rotation handle, all selected nucleotides will rotate, using the cross-hair location as the center of rotation. The cross-hair can be dragged to any desired location.
Helix and Multi-Loop Repair
When a paired nucleobase is selected, pressing the R key (with no other keys held down) will "repair" the helix that contains the selected base. This causes all the bases in the helix to be aligned and evenly spaced along the axis of the helix. The axis of the helix is defined as the line from the midpoint of the first basepair in the helix to the midpoint of the last basepair in the helix.
Similarly, when an unpaired nucleobase is selected, pressing the R key (with no other keys held down) will "repair" the Multi-Loop that contains the selected base. This causes all the unpaired bases in the Multi-Loop to be evenly spaced around the circumference of the circle formed by the Multi-Loop. It also repositions any helices that enter or exit the Multi-Loop and aligns them along the axis normal to this circle. The radius of the circle is determined based on the current average distance of each base in the Multi-Loop from the center of a best-fit circle.
The above two repair operations are applied to ALL Helices and Multi-Loops that contain bases in the current selection. You can quickly repair multiple Helices and Multi-Loops at the same time by simply selecting at least one nucleobase in each Helix or Multi-Loop that you want to repair and then pressing R.
Back to Top
Coloring Nucleobases
Clicking brings up a dialog window that can be used to color nucleobases according to a wide variety of criteria. Nucleobases have four properties that can be colored independently:
Nucleobase Properties that can be Color-formatted:
| Fill |
The background/interior of the base. |
 |
| Outline |
The outline/border of the base. |
 |
| Text |
The symbol/foreground of the base. |
 |
| Bonds |
The color of the basepair/bond associated with a base. |
 |
This Color Dialog has four tabs, each of which provides a different method of coloring bases:
Color Dialog Tabs (Methods of Applying Color to Nucleobases)
| Basepair Probability |
Automatically color nucleobases according to the probability that they are paired (or unpaired) correctly. This requires additional information in the form of basepair probabilities that can be obtained from a PFS file (which can be obtained from the partition program) or a text file that lists pairwise probabilities for each possible basepair. |
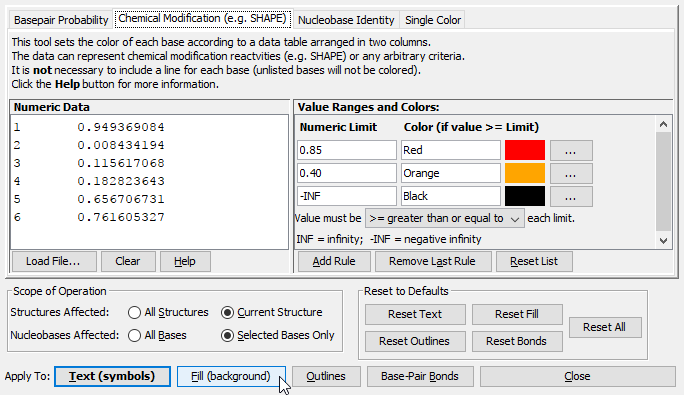
Chemical Modification
(e.g. SHAPE) |
Automatically color nucleobases according to SHAPE reactivities or any other type of chemical modification or analysis data which assigns a numeric value to some or all nucleobase indices in a sequence. |
| Nucleobase Identity |
Automatically color nucleobases according to their sequence identity (e.g. G C A U etc) |
| Single Color |
Manually apply a single, chosen color to all selected nucleobases. |
Any of the above methods can apply colors to any of the properties (Fill, Outline, Text, or Bond) of the effected nuclobases. It is even possible to combine them, for example the Text of all bases can be colored according to sequence identity, while the Fill color can be set according to basepair probability, etc.
To apply colors, simply select the desired tab and customize the colors and other settings as desired. For Basepair Probabilities or Chemical Modification, you must either type (or copy/paste) data or load it from a file. Then click the button at the bottom of the dialog that corresponds to the nucleobase property you would like to set.
Back to Top
Saving and Exporting Files
When you have finished editing a structure or drawing, you can save it in several different formats.
The menu command (keyboard shortcut: Ctrl+S or ⌘Cmd+S on Mac) will let you save the drawing in the StructureEditor's native file format (Nucleobase Structure Drawing, NSD). This format saves all sequence, structure, layout (X, Y positions of bases) and formatting (e.g. color) information.
It is also possible to export information from the drawing in several other formats using the menu command (keyboard shortcut: Ctrl+Shift+E or ⌘Cmd+Shift+E on Mac). You can then select the desired output file type from the File Type drop-down menu at the bottom of the Export Drawing dialog that appears. Some of the output formats are listed below.
File Formats for Save and Export
Sequence Files:
FASTA, SEQ,
or Plain Text |
The sequence is exported without any structure (e.g. basepairs), layout, or formatting information. |
Structure Files:
Connection Table (CT) or
Dot-Bracket (DBN) |
These are standard formats for saving RNA (or DNA) sequences along with structure information (basepairs). However, layout (X, Y positions of bases) and other formattting (base colors etc) are not saved in these files. |
| Extended CT (CTE) |
This format is identical to CT except that it contains additional columns in the connection table that that indicate the X, Y positions of bases as well as some formatting information (e.g. base colors).
This format is provided because it preserves much of the added drawing information (e.g. layout and formatting) but at the same time is more compatible with software that typically reads CT files. (All that is required is for the software to ignore columns after those found in standard CT files). Therefore it might be possible to store drawing information in the same file that is passed to CT structure analysis programs. |
| Nucleobase Structure Drawing (NSD) |
As mentioned above, this is the native file format of the StructureEditor program. The file format is a text file with a syntax similar to JSON. In it, each base is considered to be an "object" with properties such as X,Y positions, color, etc.
This format can fully save all information from StructureEditor drawings. |
| Image Formats for Export |
| Portable Network Graphics (PNG) |
The full drawing is exported at 100% zoom with a transparent background. PNG files are compressed bitmaps. They are high quality and great for use on the web, but they do not resize as well as vector graphics such as SVG, which are recomended for publication. |
| JPEG Image (JPG, JPEG) |
This is a lossy compressed bitmap image format. The full drawing is exported at 100% zoom with an opaque background (because JPEG does not support transparency). |
| Scaleable Vector Graphics (SVG) |
The drawing is exported as vector graphics objects (which includes shapes and text etc). This is a high quality format that can be resized without loss of resolution and so it is an excellent choice for publication. In addition, you can open the exported SVG file in 3rd-party programs such as Inkscape or Adobe Illustrator to further modify the drawing or add labels or other annotations. |
|
 Format > Redraw
 Format > Redraw Circular
 Format > Redraw Linear
 View > Zoom In
 View > Zoom In
 View > Auto-Fit
 View > Reset Zoom
 Edit > Select Individual Nucleobases
 Edit > Select Helices and Loops
 Edit > Select Branches