Draw an RNA Structure with the StructureEditor Program
In this step, you'll open a structure file (CT) in the StructureEditor program and manipulate the default drawing to improve its presentation.
This step assumes you have already completed Step 2 in the workshop, in which you predicted the structure of the tRNA RA7680. If you have not completed that step, please do so before continuing, because we will use the output files from that step.
-
Install and Run the StructureEditor program
- Windows: Double-click the StructureEditor Shortcut on the Desktop or launch it from the Start Menu.
- Mac OSX: Download and run the StructureEditor.dmg file. You can copy the StructureEditor App into your Applications folder or into a location of your choice. Then run the StructureEditor App.
- Linux: Run the StructureEditor bash script inside the RNAstructure/exe directory.
-
Briefly Review Documentation
This tutorial only demonstrates a few features of the StructureEditor. For more detailed information, click or press F1 to view additional documentation about program features and usage.
-
Open the CT file.
- In the StructureEditor program, click (or click the "open-folder" icon from the toolbar).
- Locate the CT file produced in Step 2 of the workshop. It should be called RA7680_Fold.ct. Once you have found the file, select it and click "Open" in the file selection dialog.
- The structure will be drawn according to a default radial algorithm. The initial drawing is often sufficient to understand the structure, but manual modifications may be desired to produce publication-quality figures.
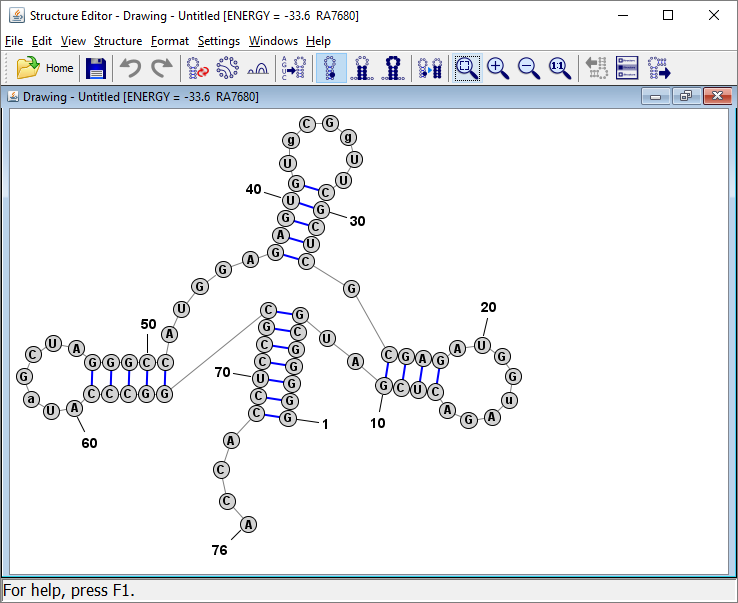
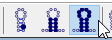
Tip: You can also redraw the structure in circular mode or linear mode using the menu or the associated toolbar buttons:
 . You can then redraw the structure in radial mode by pressing Control+R (Command+R on Mac) or by clicking the toolbar button:
Tip: When you open a CT file that contains multiple structures, you can view alternate structures using the menu or by clicking the associated toolbar icons:


-
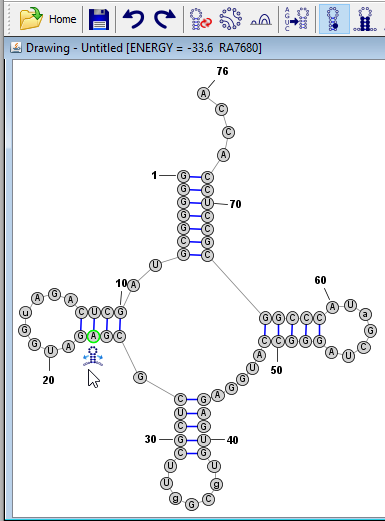
Reformat the Multi-Branch Loop
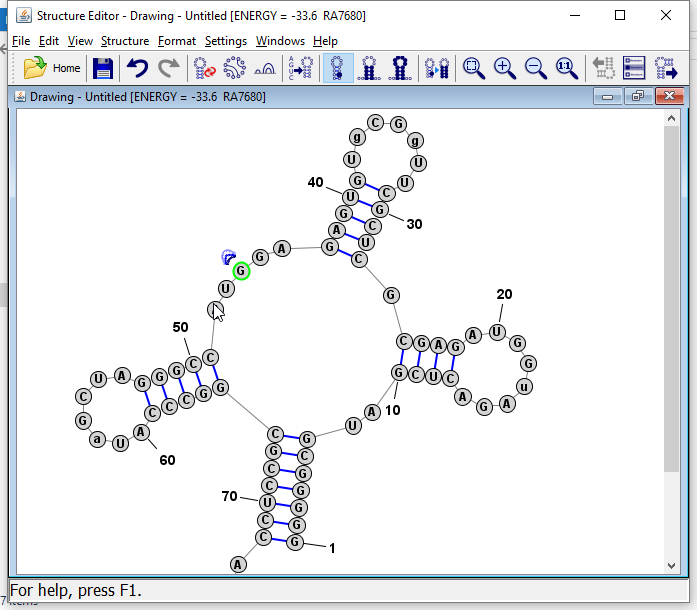
Click on any one of the unpaired nucleobases in the multi-branch loop region. Then press the "R" key. This causes the program to reformat or repair the multi-branch loop, which essentialy lays out each branch and nucleotide in the loop in a circle.
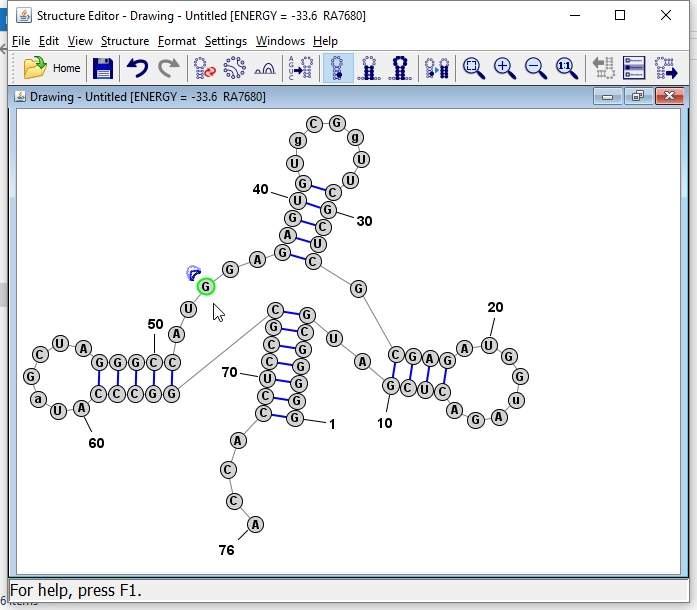

Tip: You can also click on any base in a helix and press "R" and the helix will be "repaired", which means the bases are lined up in pairs along the axis of the helix (which is defined as the line connecting the midpoints of the two terminal basepairs of the helix).
-
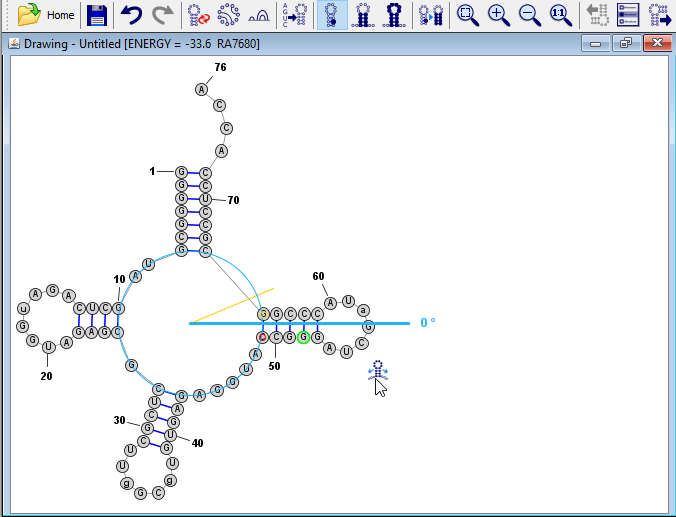
Rotate the drawing.
By convention, tRNAs are usually drawn with the acceptor stem on top, so we will rotate the structure. Press Control+A (or Command+A on Mac OSX) to select all nucleobases. A rotation "drag-handle"
 will appear in the top-right corner of the drawing. Click on this icon and drag it until the acceptor stem (the "trunk" helix that contains nucleobase 1) is at the top, relative to the rest of the structure.
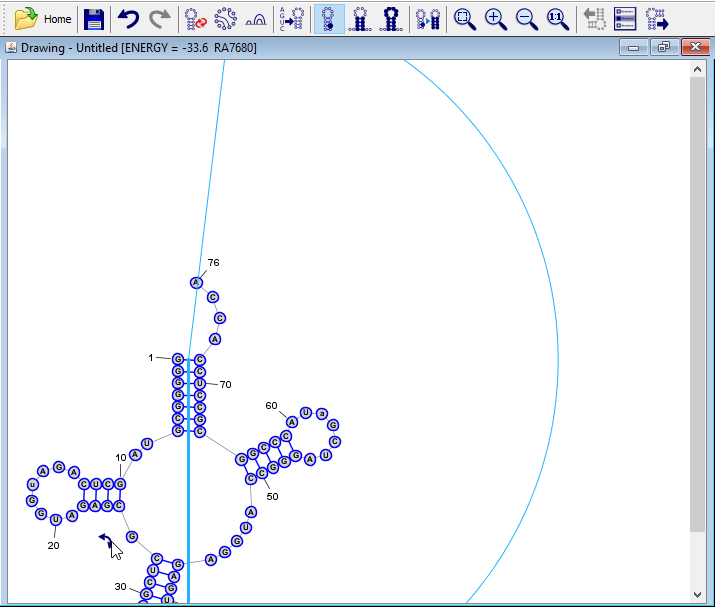
Tip: The rotation drag-handle appears whenever multiple bases are selected. If a helix is selected, the center-of-rotation is automatically chosen to be the midpoint of the first basepair in the helix. However, you can change the center-of-rotation by dragging the center-of-rotation drag handle
 to any desired location.
Tip: Light-blue guide lines appear during rotation. The lines become slightly thicker and rotation "snaps" into place at angle multiples of 60 and 45 degrees. If the snapping behavior is not desirable, hold down the Control key (Command key on Mac) to temporarily disable it.
-
Auto-Fit the Structure
When manipulating a structure, it is often necesary to change the magnification level (aka zoom). Try to zoom in and out of the current drawing and finally click the Auto-Fit button
 which will draw the structure as large as possible, while ensuring that it fits within the view of the window. It also moves the structure to the top-left of the current view.
 -
Align the Helices
Click on any of the bases in the helix on the right side of the structure. The "Branch-Slider" drag-handle
 will appear. Click on that icon and drag your mouse down until the helix is positioned at 0 degrees (at a right angle relative to the acceptor stem).
 Tip: The branch-slider automatically rotates a helix/branch while attempting to preserve the circumference of multi-branch loops (or internal loops). In addition, it redistributes bases along the loop regions before and after the affected helix.
Next, click on a base in the bottom helix then use the branch-slider icon to align it at -90 degrees. Then align the right helix in the same way at -180 degrees.
-
Reposition Branches (optional)
Click on any of the nucleobases in the helix on the right of the structure. Then press the spacebar. You'll notice that this causes all of the bases in the helix to be selected. Press the spacebar again and the entire branch (the helix along with the hairpin loop) are now selected. Now click and drag on any of the bases in that branch to move that branch (e.g. to a position closer to the acceptor stem).
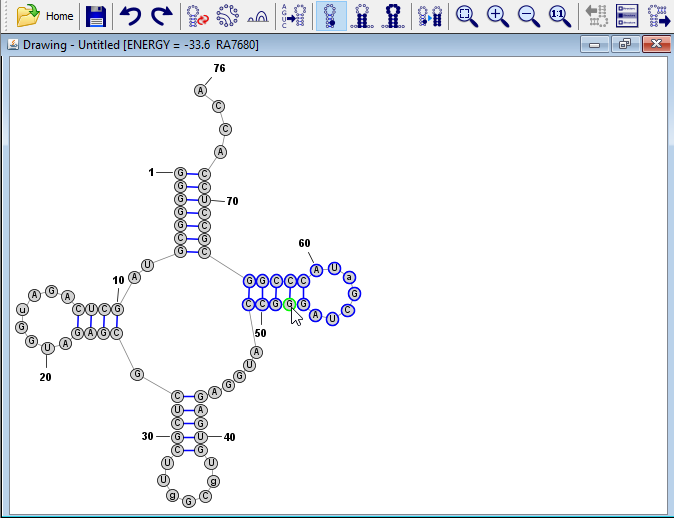
Tip: Pressing spacebar expands the selection from a single nucleotide to the helix or loop that contains it. Pressing the spacebar a subsequent time further expands the selection to the entire branch/domain.
Tip: You can change the selection mode from "Single" to "Branch" mode by pressing "B" or by clicking the associated toolbar icon
 . In Branch-Selection mode, whenever you click on a base, the entire branch that contains it is automatically selected. This can make it easier to move branches around, but don't forget to switch back to Single-Selection mode, by pressing "N" or clicking the associated toolbar icon, when you are done.
 -
Resize a Loop Region (optional)
Click on one of the bases in the loop region on the lower right side of the drawing. The "Loop Resizer" drag-handle will appear
 . Click on this icon and drag it to resize the loop region to the desired size.
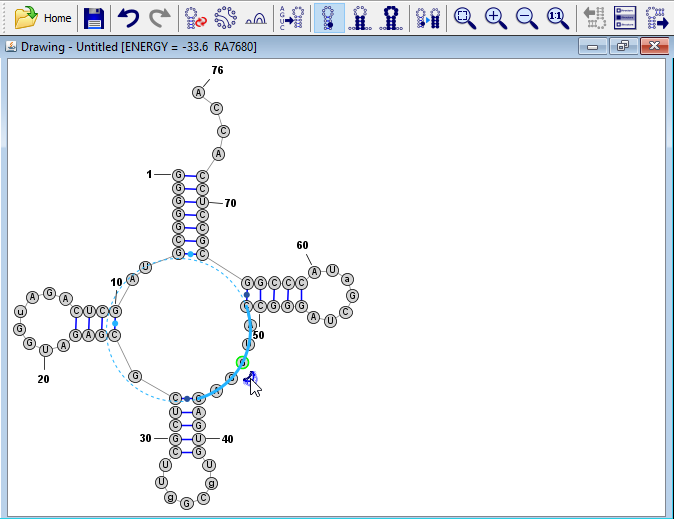
-
Color-Annotate Bases
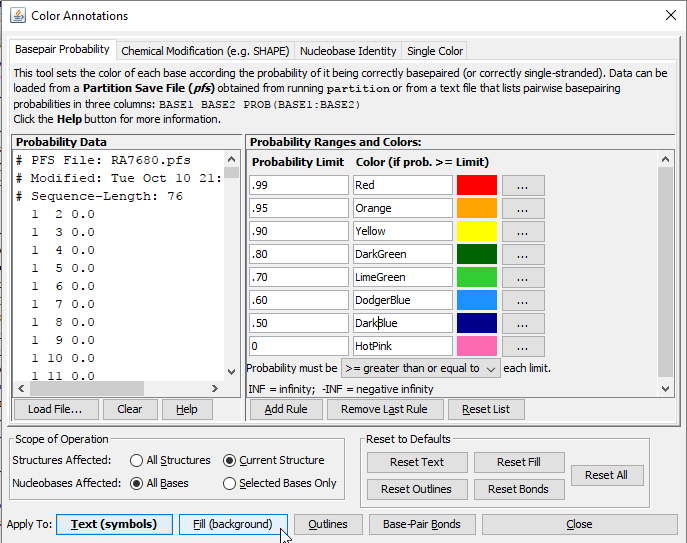
Click the menu item Format > Color-Annotate Bases. This opens a dialog window that will allow you to apply color to nucleobases in a drawing using a variety of different methods of assignment. We will color-annotatate the bases according to the base-pair probabilites that were calculated in Step 2 of the workshop.
Make sure the "Basepair Probability" tab is selected in the Color Annotations dialog window. In the "Probability Data" section, click the Clear button to remove the example data. Then click "Load File". Locate the file RA7680.pfs and click "Open". This is a Partition Function Save file that was created when you predicted the structure of the RA7680 sequence (it should be located the in same directory as RA7680_Fold.ct which you opened at the beginning of this lesson).
Tip: You can also load probability data in text format, for example data produced by ProbabilityPlot or another similar tool.
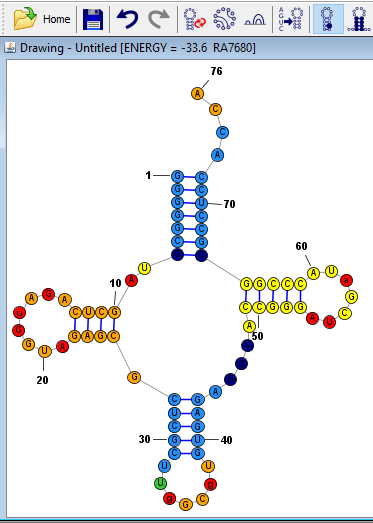
Once you have loaded the probability data, make sure that "All Bases" is selected next to "Nucleobases Affected" and then click the "Fill (Background)" button at the bottom of the dialog.
Tip: You can color the text (symbols) or the outlines nucleobases instead of their fill (backround) by clicking different buttons at the bottom of the Color Annotations window. You can reset the text, fill or outline colors back to normal by clicking the buttons in the "Reset to Defaults" section near the bottom right of the dialog. The color of the bonds (which indicate basepairs) can also be colored using this tool.
-
Save and Export the Drawing
Click then type a name for the drawing and click Save. The file is saved as a "Nucleic Acid Structure Drawing (nsd)" which contains all the information to reproduce the drawing, including the colors and positions of the bases and basepairs. This is the native format of the StructureEditor program.
Tip: It is also possible to export a drawing to other file formats (which contain less information) such as CT, DBN, or FASTA, etc.
Next, click . Iin the save dialog that opens, click the drop-down select the type of file. Choose "SVG - Scaleable Vector Graphics" file. Type a name for the file and then click Save. This exports the file as a publication-quality SVG file that can be opened in programs like Inkscape, Adobe Illustrator, or embedded in web pages. You should also be able to open this file with your web browser to preview it.
Tip: You can also export a drawing as a JPEG or PNG file also. These image formats are more portable and can be opened by a wider variety of software, but they can not be resized without loss of quality like SVG files.